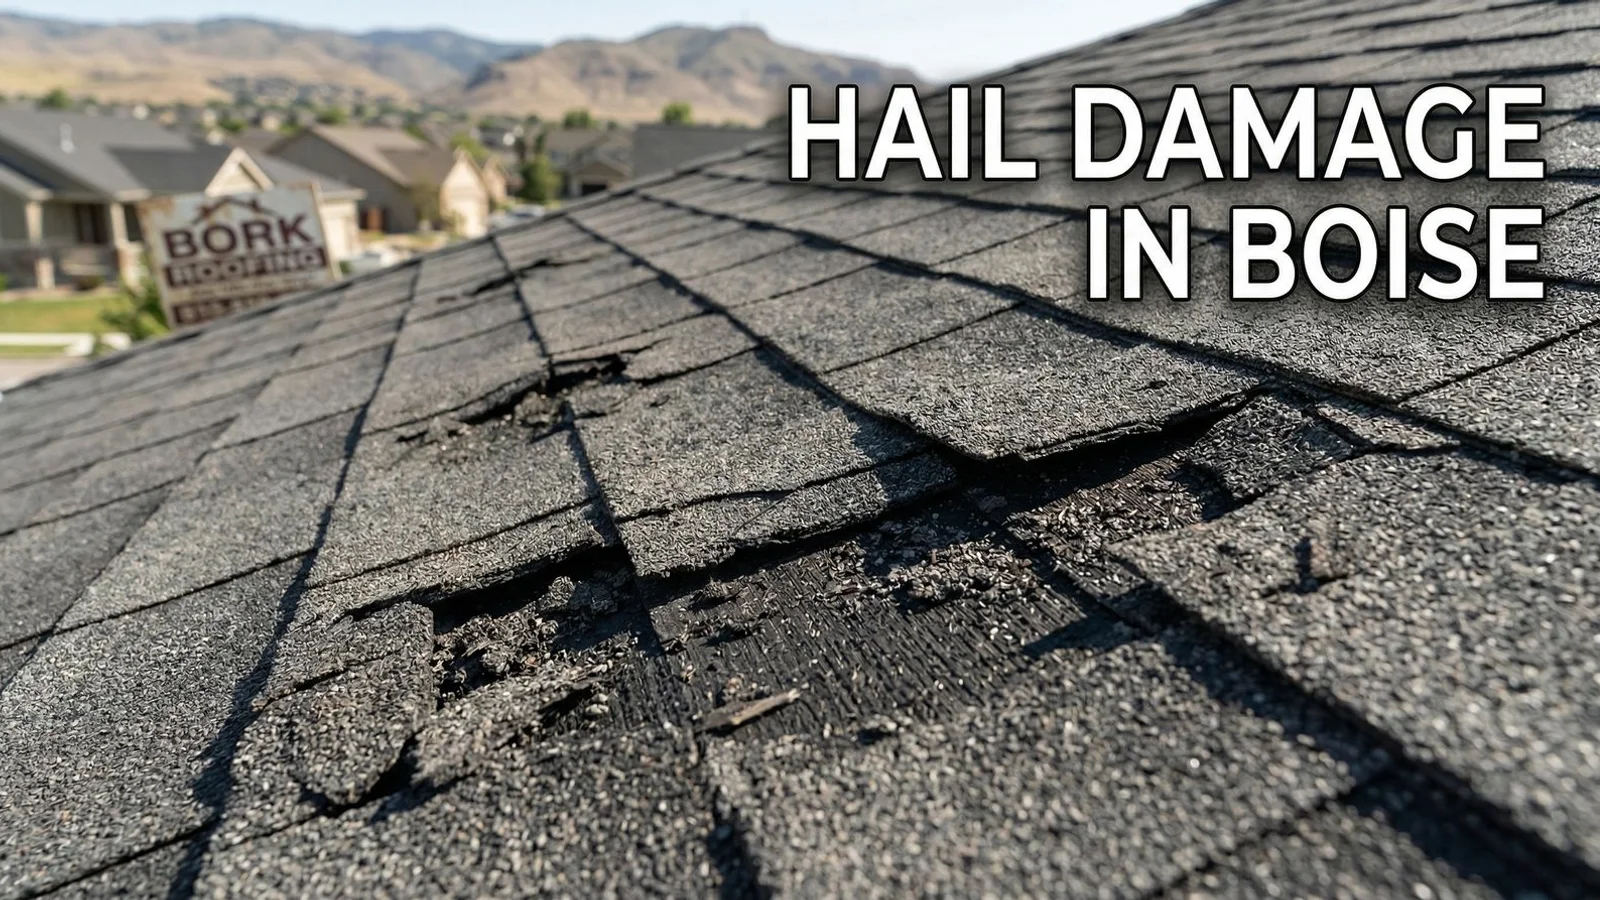
Most property owners assume a major hailstorm guarantees an automatic roof replacement. The reality of insurance claims is actually much more complicated.
If you are reading The Complete Guide to Hail Damage Roof Insurance Claims in Idaho, you likely need real answers. We see contractors knocking on doors within 48 hours of every Boise storm, but not all damage justifies a claim.
In 2025 alone, ZestyAI data showed Idaho properties faced $12.8 million in potential hail damage exposure. This massive financial risk means insurance adjusters scrutinize every single submission carefully.
Our team will break down the exact process for evaluating impacts, handling the adjuster meeting, securing a fair settlement, and getting the storm damage restoration crews rolling.
Let’s look at the facts and walk through the exact steps to protect your property.
Step 1: The Free Post-Storm Inspection
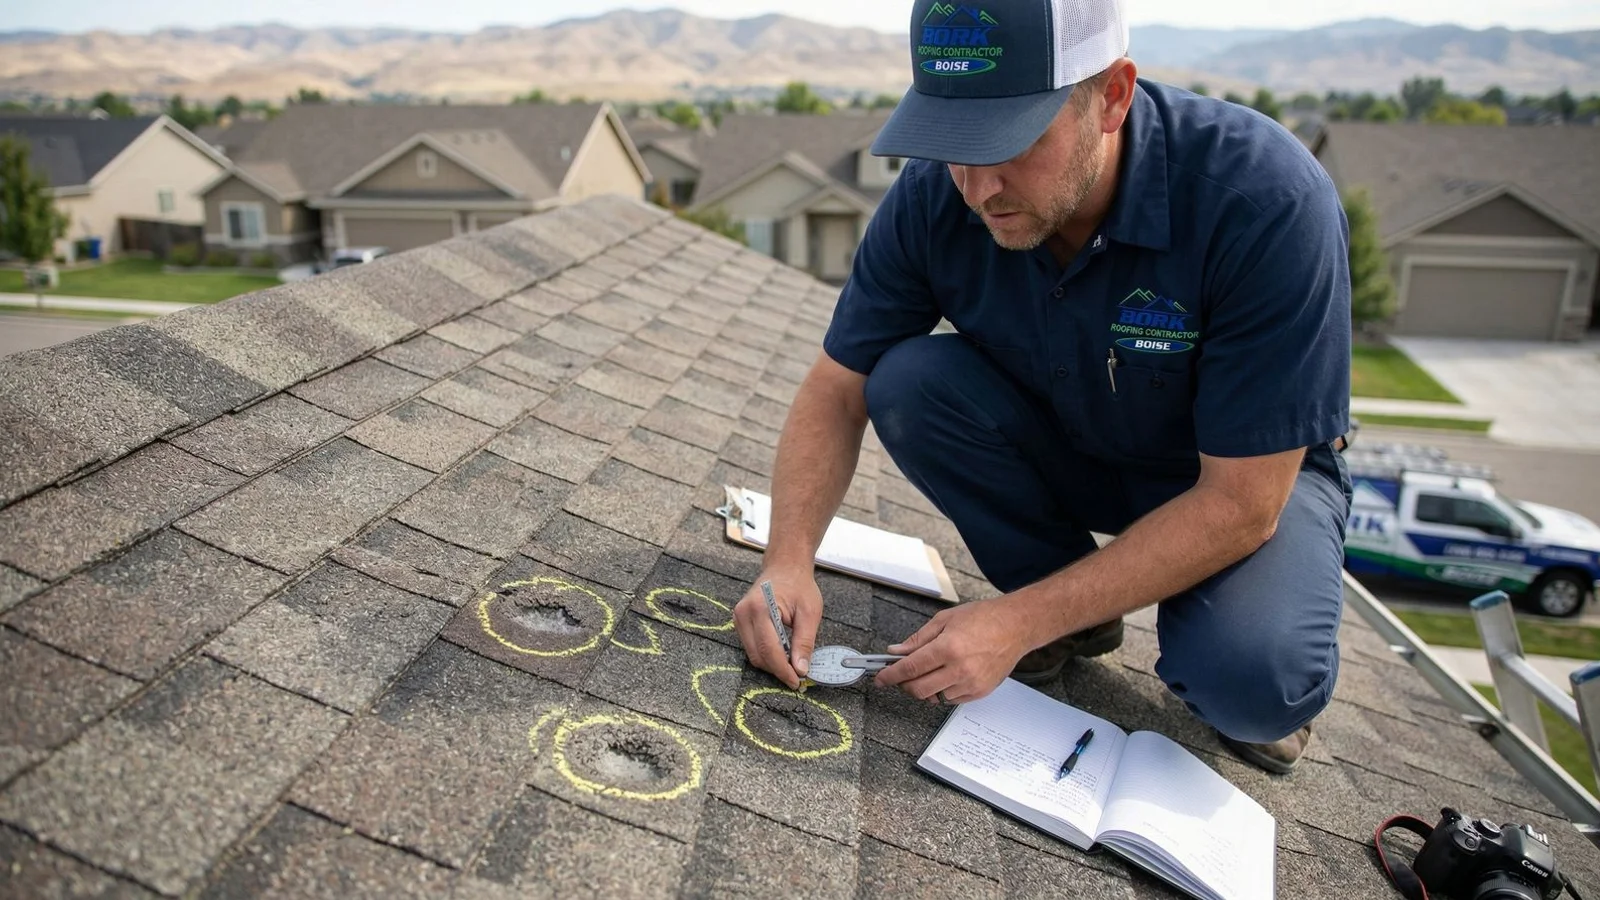
Before you file a claim, you need to verify that your roof has legitimate structural damage. Filing without confirmed evidence can hurt your policy rating and raise your premiums. This is especially true if the claim gets denied.
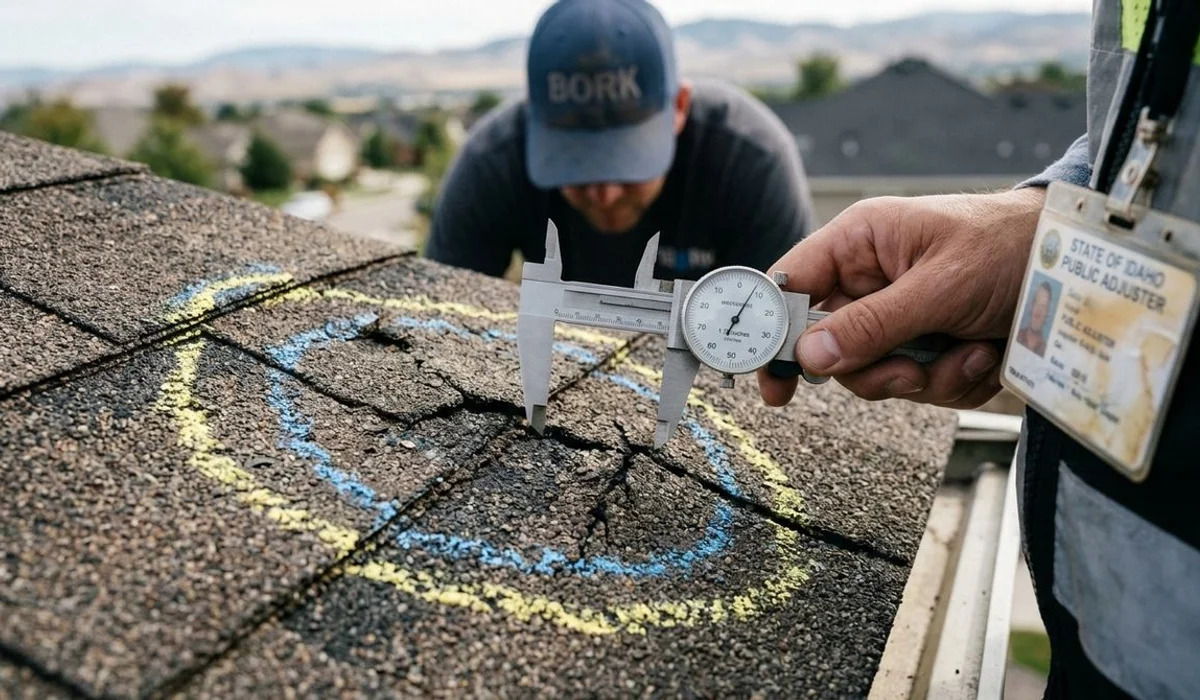
We always start our inspections by checking the soft metals first. Aluminum gutters, window wraps, and HVAC fins dent much easier than asphalt shingles. Finding impacts on these areas provides the corroborating evidence adjusters look for.
Our inspectors look for specific indicators of fresh damage:
- Dark, circular marks on Owens Corning or GAF asphalt shingles.
- Exposed fiberglass mats where granules have washed away.
- Bruises that feel soft to the touch, indicating recent impact.
- Dents in roof vents, flashing, and valley metal.
Bruise size directly correlates with the hail size that hit your property. A one-inch bruise typically means one-inch hail struck the roof.
We mark these impact zones with chalk and photograph them alongside a measuring tape.
Step 2: Should You Actually File a Claim?
Not every storm requires a phone call to your insurance provider. Many policies now include cosmetic damage exclusions that deny coverage for minor dents that do not compromise the waterproof seal.
We use a specific framework to determine if a claim is mathematically and structurally viable.
Evaluating the Damage Severity
- Scattered bruises with no broken mats: Cosmetic damage only. This rarely affects roof life and is usually not worth filing.
- Multiple bruises per square with exposed mats: Real structural damage. You should file the claim to prevent future leaks.
- Widespread damage across multiple slopes: Full replacement scope. File immediately, as this includes accompanying gutter, vent, and siding damage.
You must also consider your deductible against current market rates. Recent 2026 pricing data shows a standard full roof replacement in Boise costs between $12,000 and $28,000.
Our team recommends doing the math before opening a claim. If you have a $2,500 deductible and the damage is just $4,000, you only recover $1,500 net. That small payout might not justify a potential premium increase.
Here is a quick breakdown to help you decide:
| Scenario | Estimated Cost | Action to Take |
|---|---|---|
| Minor cosmetic dents on vents | $500 - $1,500 | Pay out of pocket. Do not file. |
| 1-2 damaged slopes | $4,000 - $8,000 | Compare against your deductible. |
| Full roof structural damage | $12,000 - $28,000 | File the claim immediately. |
Step 3: File the Claim
Opening a claim correctly sets the foundation for your entire project. The American Policyholders Association notes that roughly 10% to 15% of homeowner storm claims face initial denial.
We recommend gathering solid proof to prevent this from happening to you. Save severe weather reports and hail size data from the National Weather Service.
Call your insurance carrier directly on their claims line to open the file. Do not call your local sales agent, as they do not process settlements.
Be highly specific with your language and cite a verifiable storm date. You should say, “I am reporting hail damage to my roof from the July 4, 2025 storm.”
Scheduling the Adjuster
The carrier will assign you a claim number and schedule an adjuster visit, typically within 5 to 14 days.
Our standard practice is to ask clients for the adjuster’s direct contact information. This allows us to coordinate and meet them on site.
Homeowners whose contractor attends the adjustment consistently get better, more accurate settlements than those who handle it alone. Having a professional on the roof ensures all damage gets documented properly.
Step 4: The Adjuster Meeting
The adjuster meeting is the most critical moment in the entire process. The representative will climb the roof and decide whether to approve a full replacement or just a partial repair.
We arrive at this meeting fully prepared with our own photographic evidence and measurements. Walking the adjuster through every damaged slope allows us to advocate for a complete replacement when the structural damage supports it.
What the Adjuster Evaluates
Insurance companies rely heavily on industry-standard estimating software like Xactimate to calculate costs. The adjuster will input specific variables into this program based on what they find during the inspection.
They generally look for these mandatory criteria:
- Minimum bruise density: Most carriers require 8 to 10 distinct bruises per 100 square feet (known as a “square”) to total a slope.
- Widespread impact: Damage must be present across multiple directional slopes.
- Collateral evidence: Dents on gutters, window screens, and metal vents confirm the hail direction.
- Local code upgrades: Requirements mandated by Idaho building codes for safe reconstruction.
A thorough adjuster writes the scope of work on site or within a few business days. You will receive a detailed line-item estimate from the carrier detailing the payout.
Our team reviews this initial “scope of loss” to ensure no crucial materials get left off the list.
Step 5: Reviewing the Scope and Requesting Supplements
Insurance estimates frequently miss critical line items that are legally required to complete the repair correctly. Estimating software updates its material pricing monthly, so an outdated price list can leave you short on funds.
We review every Xactimate scope line-by-line to verify that the pricing matches current Idaho market rates.
Commonly missing items that require a supplement include:
- Ice-and-water shields mandated for local winter conditions.
- Mandatory perimeter drip edges.
- New valley metal to prevent leaks.
- Rotted decking replacement costs.
If we find missing items or incorrect pricing, we submit a formal supplement request to the carrier. This paperwork proves why the additional funds are necessary to meet the International Residential Code standards.
Supplement approvals typically return within one to three weeks.
Our experience shows that successful supplements often add 10% to 25% to the original scope value. This adjustment is a standard, legal industry practice.
Step 6: ACV vs. RCV and Understanding Your Payout Structure
Understanding how insurance money flows is essential for managing your project budget. Most Idaho policies structure claim payouts into two separate checks based on your coverage type.
We always verify whether a client has an ACV or RCV policy before starting any construction.
The Two Types of Payouts
The first check you receive covers the Actual Cash Value, commonly referred to as the ACV. This amount represents the depreciated value of your roof at the time of the storm, minus your deductible.
Deductibles for wind and hail claims typically run between 1% and 2% of your total insured home value.
The second check covers the Replacement Cost Value, or RCV. This check provides the difference between the depreciated value and the full cost of a new roof.
You only receive this final payment, known as recoverable depreciation, after the contractor finishes the work and submits a final invoice.
Here is a simple look at how the two policy types compare:
| Policy Feature | ACV (Actual Cash Value) | RCV (Replacement Cost Value) |
|---|---|---|
| Upfront Payment | Depreciated value minus deductible | Depreciated value minus deductible |
| Final Payment | None. You pay the remaining balance. | Receives recoverable depreciation. |
| Out-of-Pocket Cost | Deductible plus depreciation gap | Only your deductible |
You pay your contractor using that first ACV check plus your personal deductible to fund the initial material orders. The second check goes directly to you once the job is complete, ensuring your only true out-of-pocket expense is the deductible itself.
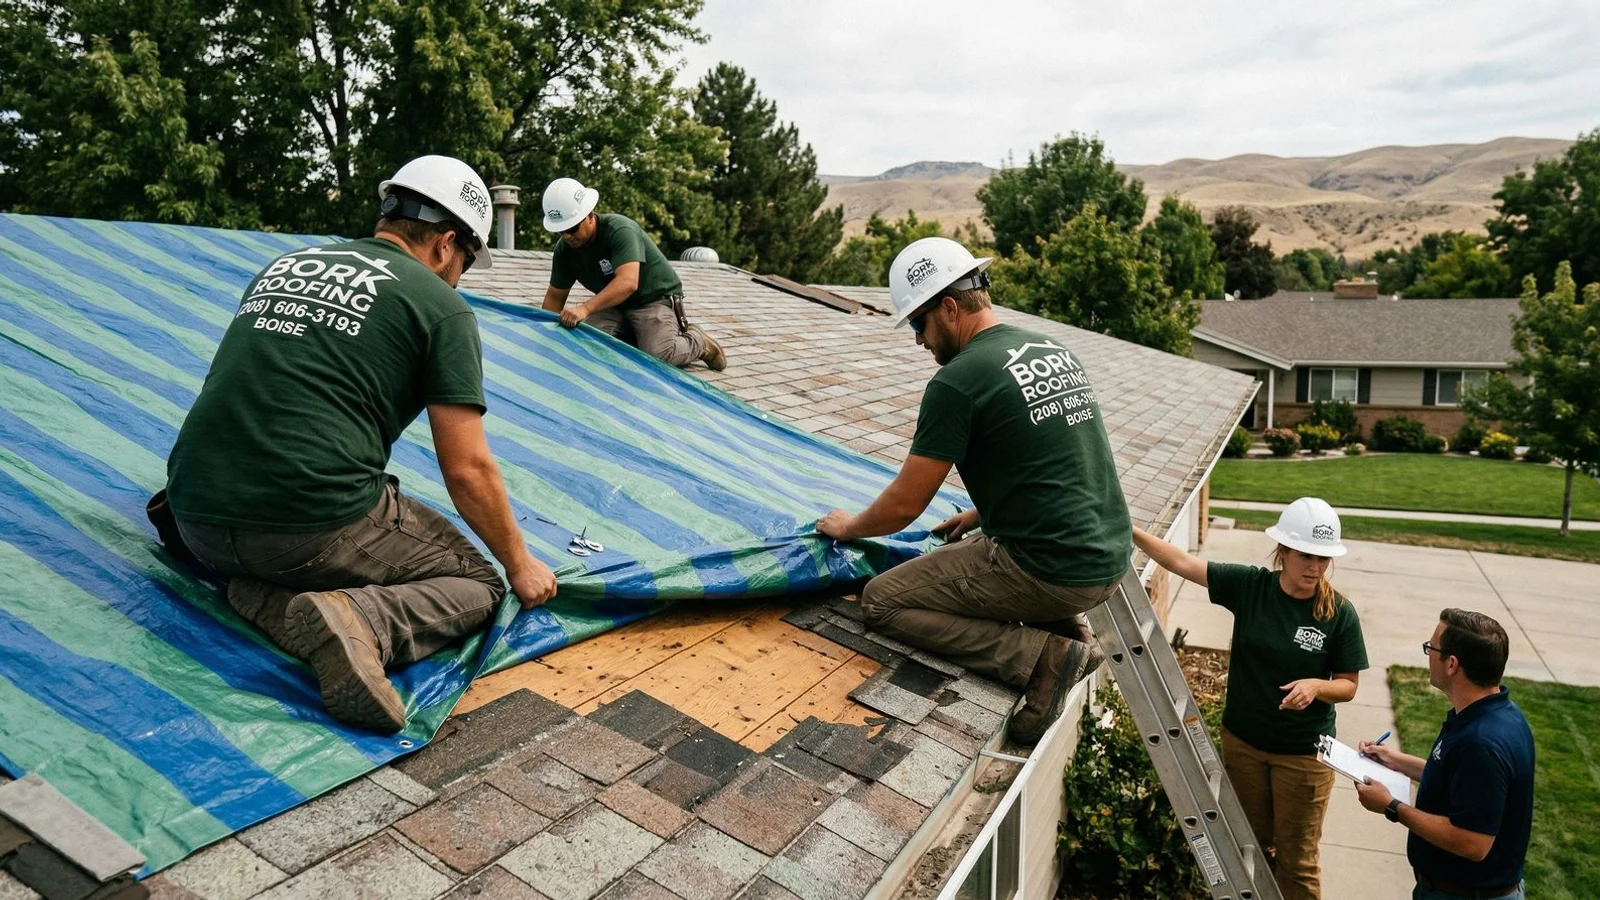
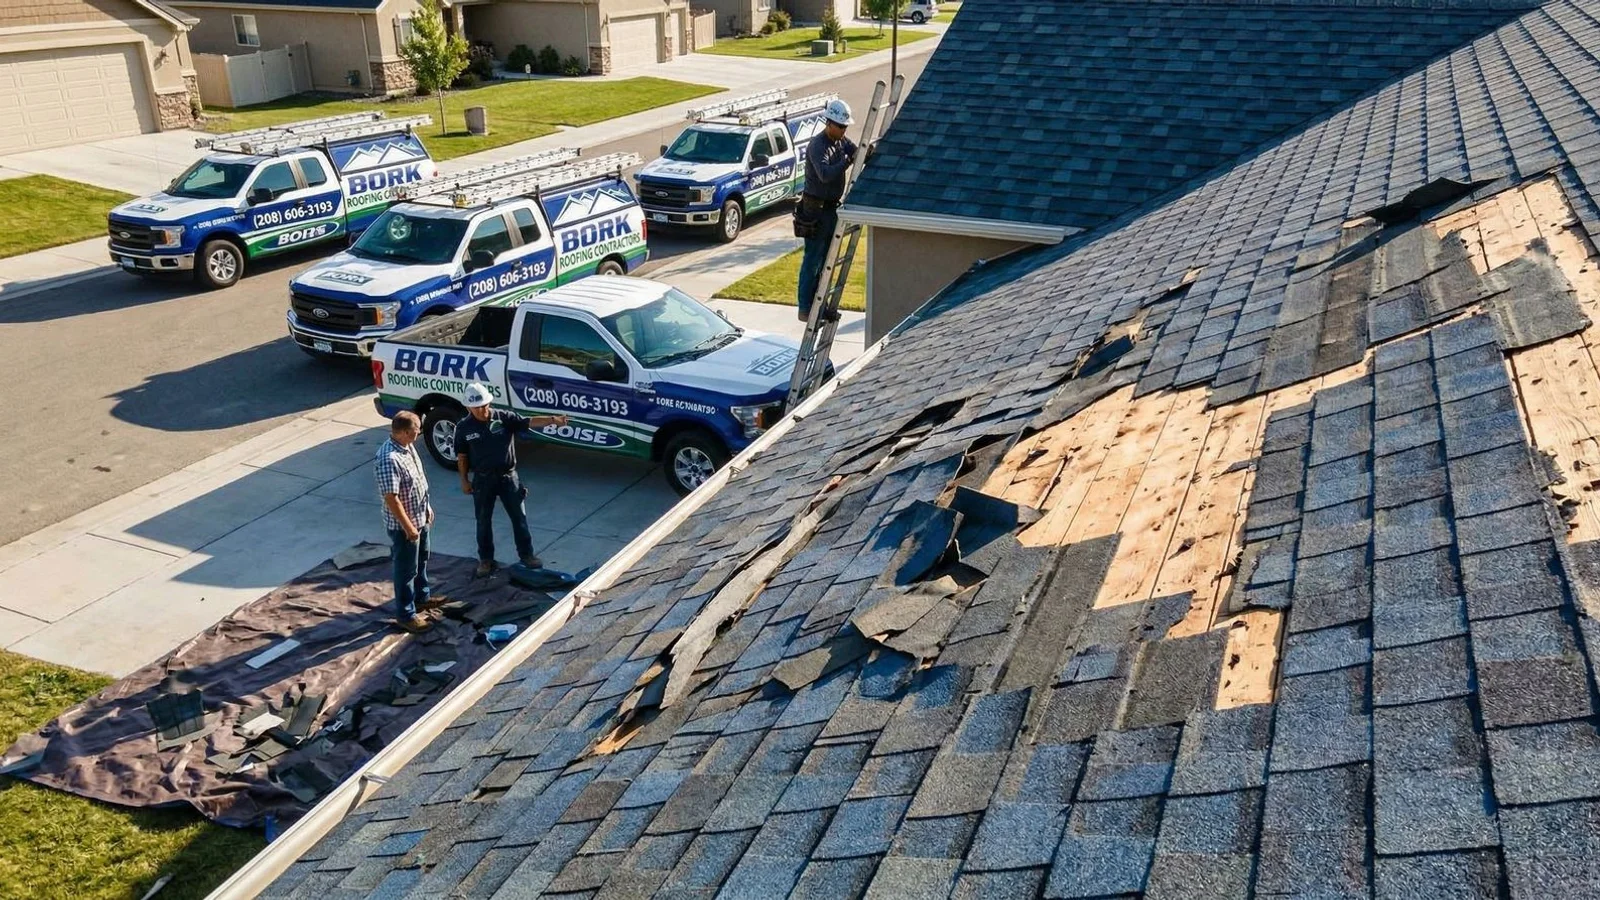
Step 7: The Restoration
Once the claim is fully settled and funded, the actual physical work begins. Securing the right materials and crew is vital for a long-lasting installation.
We schedule the restoration promptly and handle all the necessary permits for Ada County or Canyon County. Regional cost data from 2026 shows that skilled roofing labor in Idaho averages around $42 per hour.
Pro Tip: This restoration phase is the perfect time to upgrade your materials to prevent future claim headaches.
Our project managers frequently suggest installing Class 4 impact-resistant shingles. Products like the Owens Corning Duration Storm series offer superior protection against future hail events.
Many insurance carriers will actually offer a premium discount going forward if you upgrade to this higher durability rating. Taking advantage of this discount helps offset the cost of your deductible over time.
What to Avoid
The storm restoration industry unfortunately attracts bad actors who try to exploit property owners. The Idaho Department of Insurance issues regular warnings about common scams that occur after severe weather.
We strictly advise homeowners to watch out for these major red flags.
Common Industry Scams
- Waiving your deductible: A contractor cannot legally pay, waive, or absorb your deductible. Doing so requires submitting a fake, inflated invoice to the carrier. This is a felony insurance fraud under state law, and it can void your entire policy.
- High-pressure door knockers: Out-of-state crews flood into Boise after a storm. Always verify their local physical address, state licensing, and general liability insurance before signing any paperwork.
- Contingency clauses: Avoid contracts that legally bind you to one specific contractor before the insurance company even approves the claim.
Our company refuses to use contingency contracts. Earning your business should happen through transparent inspections and accurate Xactimate estimating, not legal traps.
Director Dean L. Cameron of the Idaho Department of Insurance urges consumers to call their Consumer Affairs division if a contractor makes promises that seem illegal. Protect yourself by only hiring vetted, local professionals.
The Complete Guide to Hail Damage Roof Insurance Claims in Idaho: Next Steps
Dealing with insurance carriers and out-of-state storm chasers is stressful. Having a local advocate makes all the difference in securing the funds you actually deserve.
We hope this resource serves as The Complete Guide to Hail Damage Roof Insurance Claims in Idaho for your property.
Call (208) 545-8226 if you experienced hail or a significant wind event in your Boise, Meridian, Nampa, or Eagle neighborhood.
Our team provides free, comprehensive roof inspections. You will receive an honest assessment of your damage and a clear roadmap for moving forward.